Client Management: Building Your Database

Manage your client database efficiently within Nurish Pro. This guide covers adding new clients and migrating data from other platforms.

Add a new client

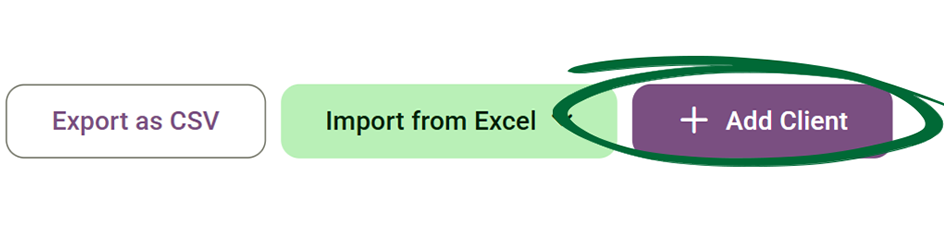
Easily add new clients to your database. Create an individual profile to start managing a client's journey.

1
Go to Clients
Navigate to the Clients section from the sidebar.
Clients section screenshot
2
Click “Add Client”
Select this option to create your client profile.
Add Client button screenshot
3
Enter Client Details
Fill in the required information (name, email, etc.).
4
Invite Client to Nurish
Enable or disable the “Invite Client to Nurish” checkbox during onboarding.
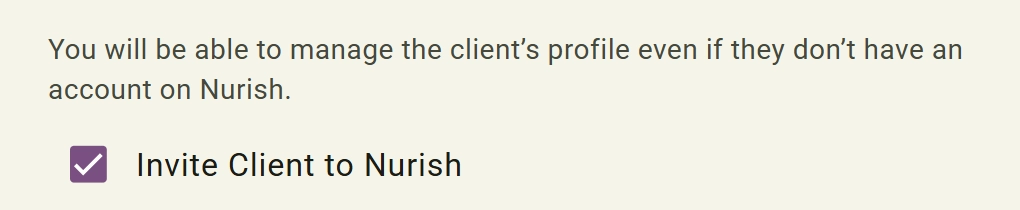
Enabled: The client receives an onboarding invitation email.
Disabled: The client is added to the system without sending an invitation immediately.
Add Client button screenshot
5
Assign to Practitioner
Choose which practitioner or team member will manage the client profile and sessions.
Add Client button screenshot
5
Save Client
6
Practitioner Reassignment
Clients can later be reassigned to another practitioner from the client management menu if needed. (Note: This feature is exclusive to Team and Enterprise subscriptions.)
Tip: Make sure client details are accurate to ensure smooth communication.
Understand Import Types

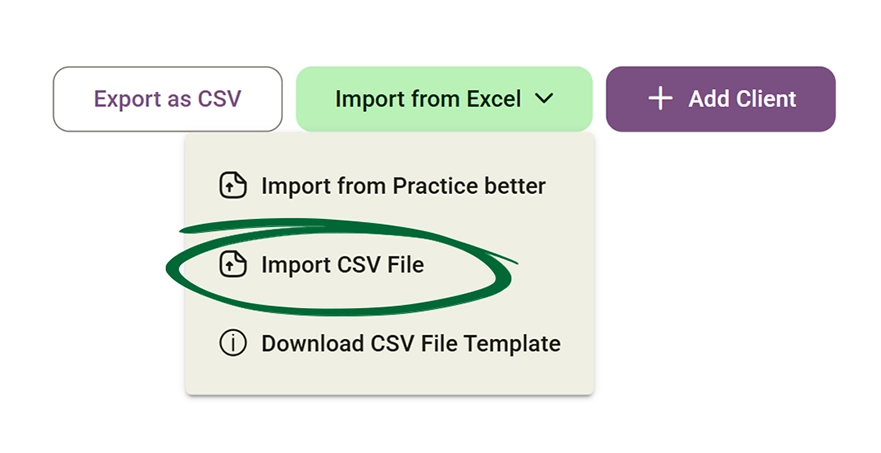
Nurish Pro supports multiple import methods, including standard CSV files and Practice Better imports. Simply choose the method that best matches the type of client data you wish to migrate into your workspace.

1
CSV Import
CSV imports are best for quickly uploading simple client records from spreadsheets. This feature is mainly used for transferring basic contact and account details, including client names, email addresses, phone numbers and dates of birth.
2
Practice Better (PB) Import
Practice Better imports transfer more advanced and detailed client information directly into Nurish Pro. This data can include anthropometric measurements, clinical tracking data, nutrition-related records, client information, and additional data.
Tip: PB import is recommended for practitioners migrating fully from Practice Better who want richer clinical data transferred into Nurish Pro.
Import Clients (CSV)

Handle large volumes of data by uploading or downloading spreadsheets. Nurish Pro supports multiple import methods including (CSV file, imports Practice Better)

1
Prepare Your File
Ensure that both the client's name and email address are included as required columns in your CSV file.
2
Go to Import
Open the import clients option.
3
Upload File
Select and upload your CSV file.
Upload CSV file for client import screenshot
Import Clients from PB

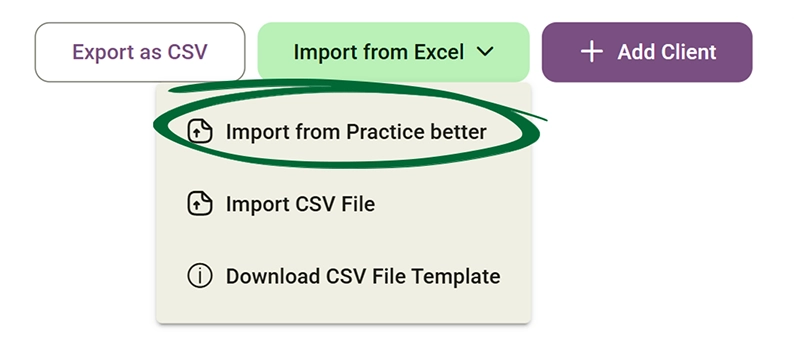
Seamlessly migrate your existing client records from Practice Better (PB) to the Nurish Pro platform for a unified clinical management experience.

1
Select Import from PB
Go to the import options and choose 'Import from PB' to initiate the external integration by uploading the PB CSV file from your local device storage.
Select Import from Practice Better screenshot
2
Select Clients
Select the specific CSV file that contains the clients you wish to import into your new workspace.
Tip: Check your imported data to ensure everything has transferred correctly.
Export Clients (CSV)

Download your client data for routine administrative backup or authorised external clinical use.

1
Go to Clients
Open the Clients section to view your active roster of clients.
Clients list screenshot
2
Click “Export as CSV”
Export Clients button screenshot
3
Download File
Your comprehensive CSV file will be automatically generated and downloaded directly to your secure local device.
Tip: Export your data regularly to keep an up-to-date backup.
Client Status Types

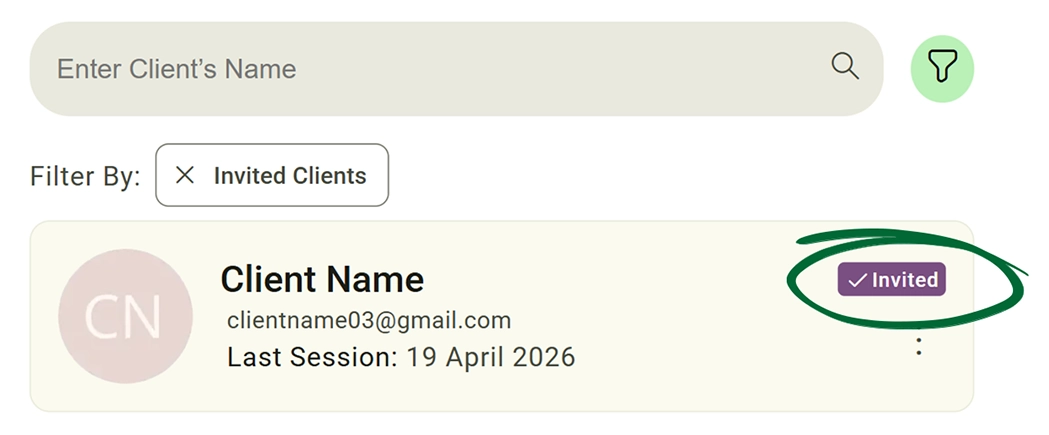
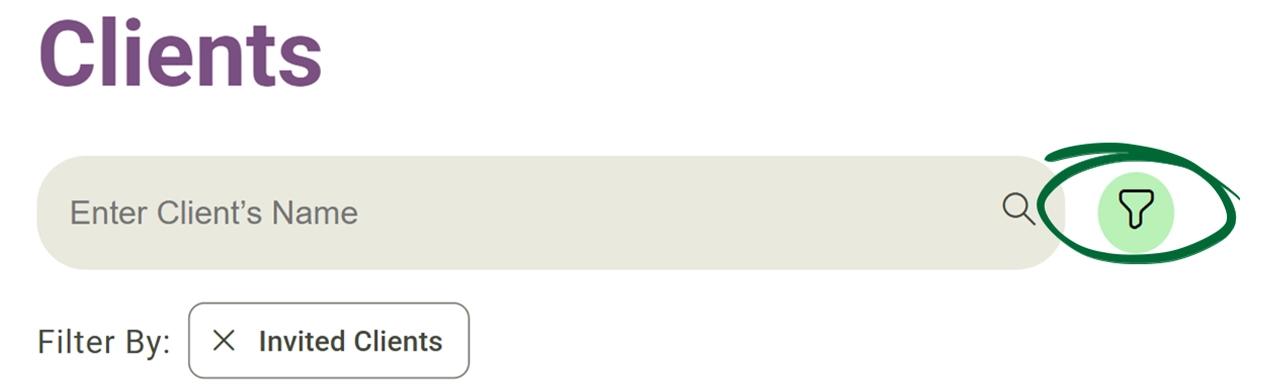
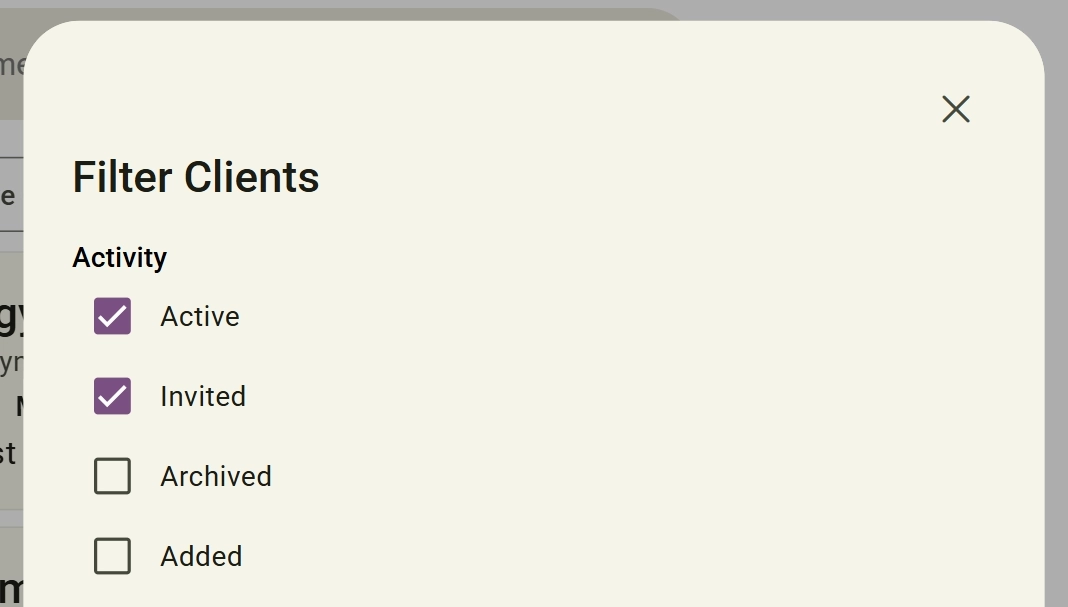
Client statuses help you quickly identify where each client is within the onboarding and booking process.

1
Active Client
An Active Client means the client is fully connected to the practitioner account. This status appears when either: The client has an active booking with a practitioner OR An invitation has been sent to the client and they have accepted the invitation.
Client Status Tracking screenshot
2
Invited

An Invited client means: An invitation has been sent to the client

The client has not yet accepted the invitation.

Client Status Tracking screenshot
3
Archived

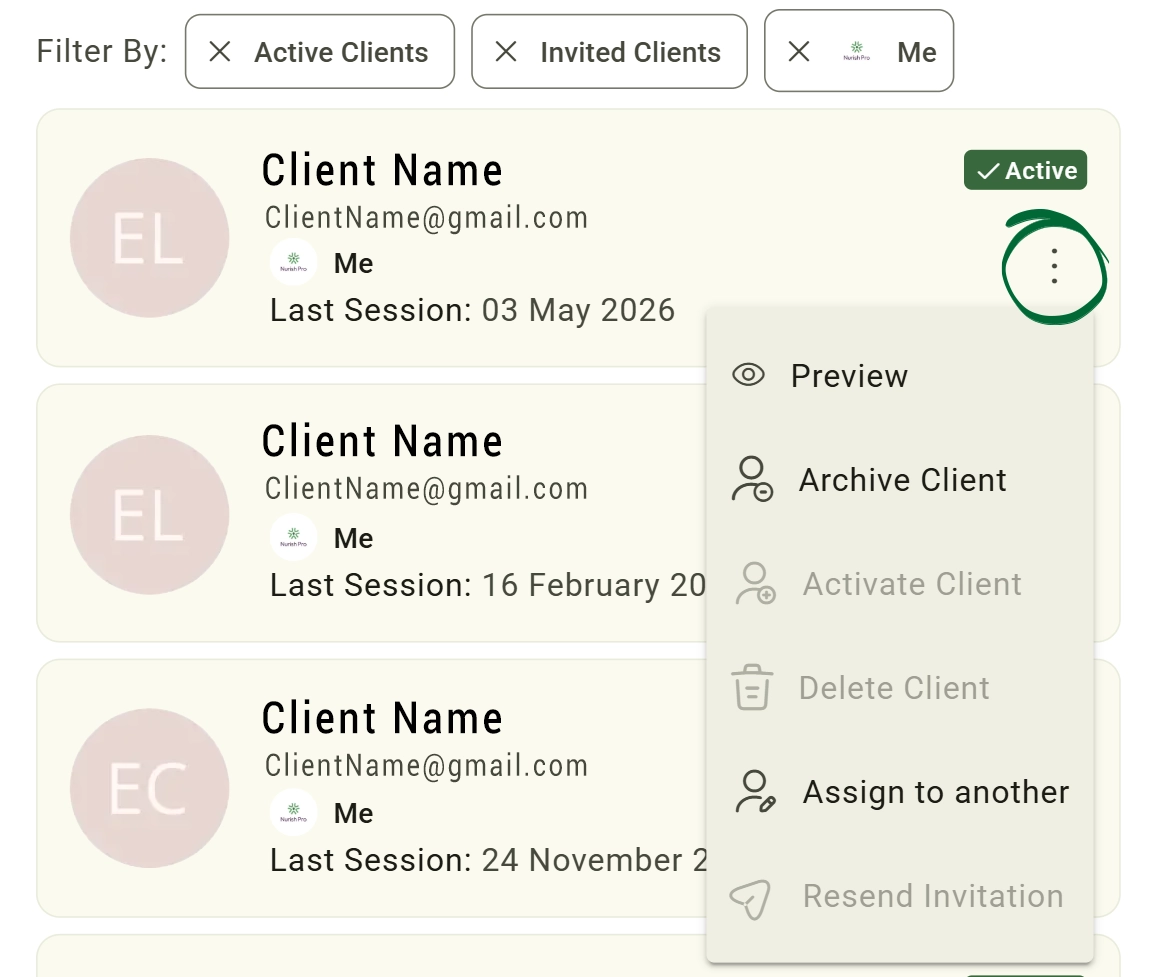
An Archived client means the client has been manually archived by the practitioner. 

This happens when: The practitioner selects "Archive Client" from the Client Controls or Options Menu. 

Archived clients remain stored in the system but are hidden from the active client list.

Client Status Tracking screenshot
4
Added

An 'Added client' means the practitioner has created the client profile manually on their side only. An invitation will not be sent, and the 'Add Client to Nurish' checkbox should NOT be selected.

This allows practitioners to maintain an internal database to save client information; the client will not have platform access or receive any notifications.

Client Status Tracking screenshot
Tip: When creating or inviting a client, you can enable the "Add Client to Nurish" checkbox. Selecting this sends the client a Nurish invitation and updates their status to "Invited." If left unselected, the client's status simply remains as "Added".
Client Actions & Management

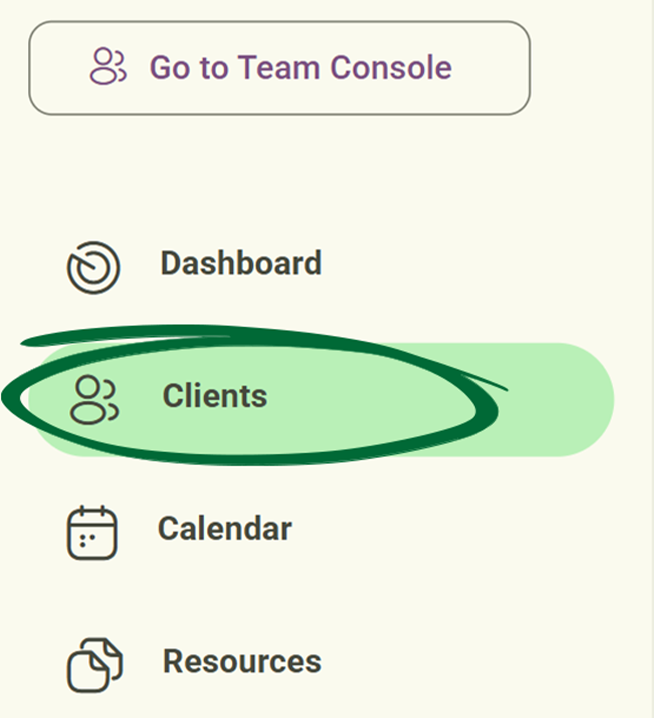
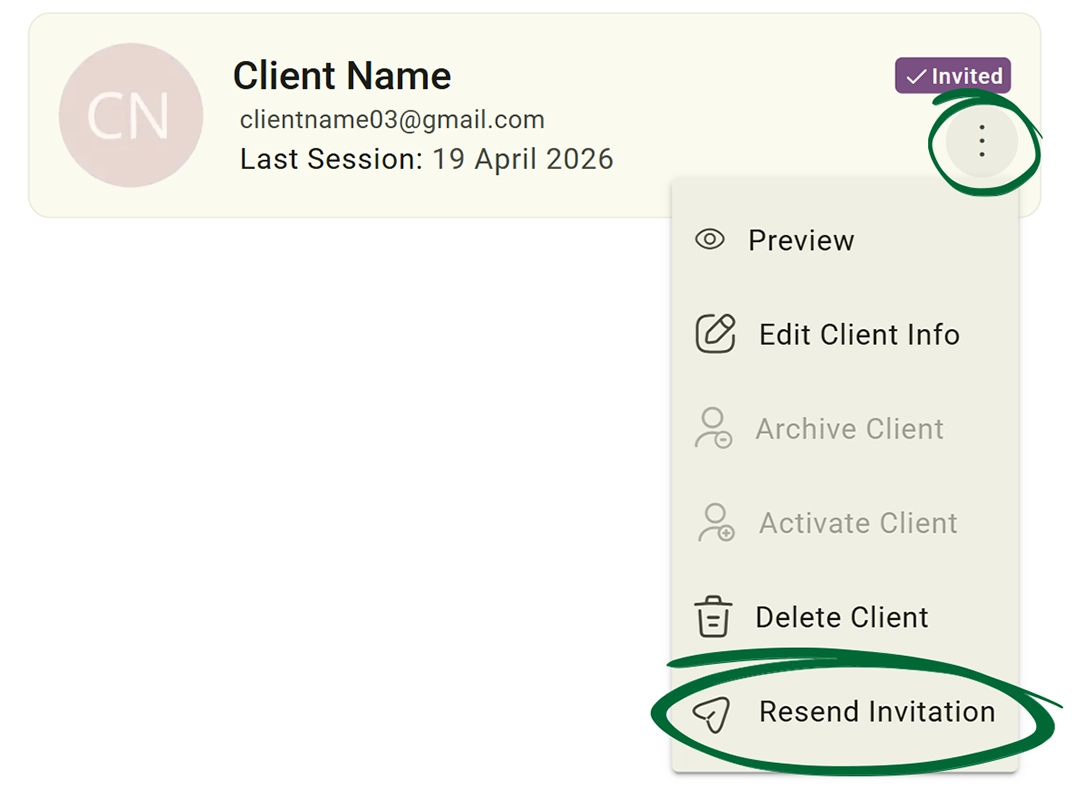
Manage client lifecycle directly from the client list.

1
Available Actions Include:
You can preview client profile, archive client, reactivate archived clients, assign clients to another practitioner, resend invitation emails, and delete client profiles (if permissions allow).
Available Actions screenshot
2
Client Status Tracking
Each client card displays: Current account status, Assigned practitioner and Last session or activity date.
Client Status Tracking screenshot
Resend Client Invitation

Resend invitation to your clients if the original email invitation is filtered into a "Promotions" or "Spam" folder, or accidentally deleted.

1
Open Client List
Go to your Clients dashboard to review the current status of all client accounts.
Clients list screenshot
2
Find Client
Locate the specific "invited" client whose profile indicates they have not yet accepted the initial invitation, or the "added" clients.
Find Client screenshot
3
Click “Resend Invitation”
Select the resend option to trigger a new automated communication to their registered email address.
Click Resend Invitation screenshot
Tip: Double-check the client’s email address before resending.
Advanced Search & Filtering

Strategically organise and view your client roster based on their status types, or by their current practitioner (if you are the practitioners' team leader).

1
Open Clients Page
Go to your primary clients list to access the comprehensive database.
Open Clients Page screenshot
2
Filter by Client Status
Organise clients using status filters such as (Active, Invited, Archived, Added)
Apply client filters screenshot
3
Filter by Practitioner
View clients assigned to a specific practitioner or team member.
Filter by Practitioner screenshot
4
Combined Search & Filters
Use the search bar together with filters to quickly locate clients within large databases.
5
View Results
See the filtered client list instantly, allowing for highly focused administrative review.
Tip: Use filters to manage large client lists more efficiently.
Frequently Asked Questions (FAQs)
Can I add a client without sending an invite immediately?
Yes, go to the 'Clients' tab in the left sidebar, press 'Add Client', fill in the required fields in the 'Add Client' overlay, make sure you do not tick the 'Invite to Nurish' checkbox, and confirm adding the client.
Does the PB import include clinical notes?
Yes, some clinical notes will be uploaded automatically to the client's profile using the client records section. while other Clinical notes and supporting documents can instead be uploaded directly within each client's profile using the client Documents and records sections. This allows practitioners to securely store and manage clinical data, files, and records directly inside Nurish Pro.
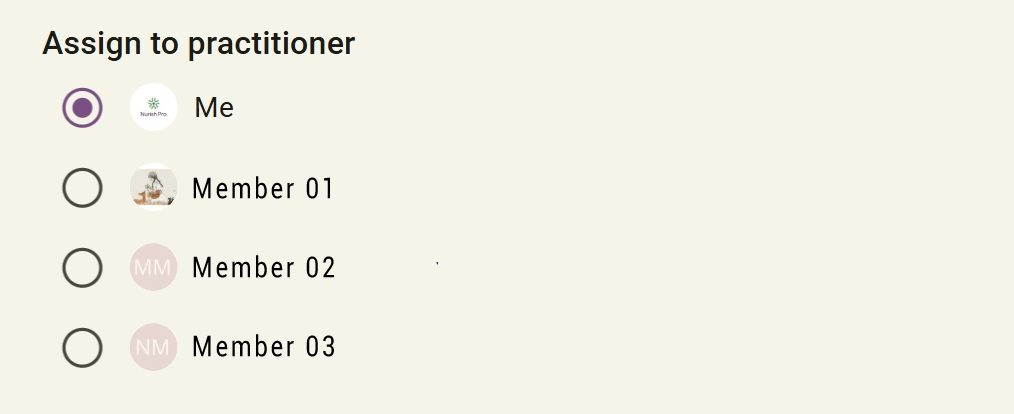
Can I assign clients to different practitioners?
Yes. Clients can be assigned during onboarding or reassigned later through the client management menu.
Can I archive clients instead of deleting them?
Yes. Archiving preserves the client’s historical information while removing them from active client views.
Troubleshooting & Common Issues
Issue: I can't find a client I just added
Potential Solution: Check if you have any active filters applied. Clear All Filters to reset the view.
Issue: Add/Save button is greyed out
Potential Solution: Ensure all mandatory fields (marked with an asterisk) are filled in.
Issue: Import tool error

Potential Solution: Ensure the file is in .CSV format. Check that the 'Name' and 'Email' columns exist.

Issue: Invite email not received
Potential Solution: Verify the email spelling. Ask the client to check their “Junk” or “Promotions” folder. You can also use the “Resend Invitation to Client” button to send the invitation again.
Issue: Client assigned to wrong practitioner
Potential Solution:  Use the “Assign to another” option from the client actions menu to transfer ownership.
Issue: Imported CSV columns not recognised
Potential Solution:  Download and use the official CSV template before importing.
Issue: Archived client not appearing
Potential Solution:  Ensure the “Archived” filter is enabled in the filter settings.

Next Step

Now that your clients are in the system, go to Appointments & Calendar to sync your schedule and open up your availability.

Go to Appointments & Calendar
Contact Support

Still need help?

Email Support: [email protected]